How to forward your newsletters
How it works
Earvia gives you a private email address. Anything you forward to that address becomes an audio episode in your Library. There are two ways to use it: forward one newsletter by hand to try it out (works on your phone or a computer), or set it up once so every new issue arrives on its own (needs a computer).
Which method should I use?
- Just want to see how Earvia sounds first? Forward one newsletter by hand. One forward, one episode, no setup.
- Want every issue to arrive on its own from now on? Set up automatic forwarding. It takes a few minutes once, then you never forward by hand again.
- You do not need to save Earvia as a contact. The address pasted directly into your email app works.
Select your email app
Try it with one newsletter (phone or computer)
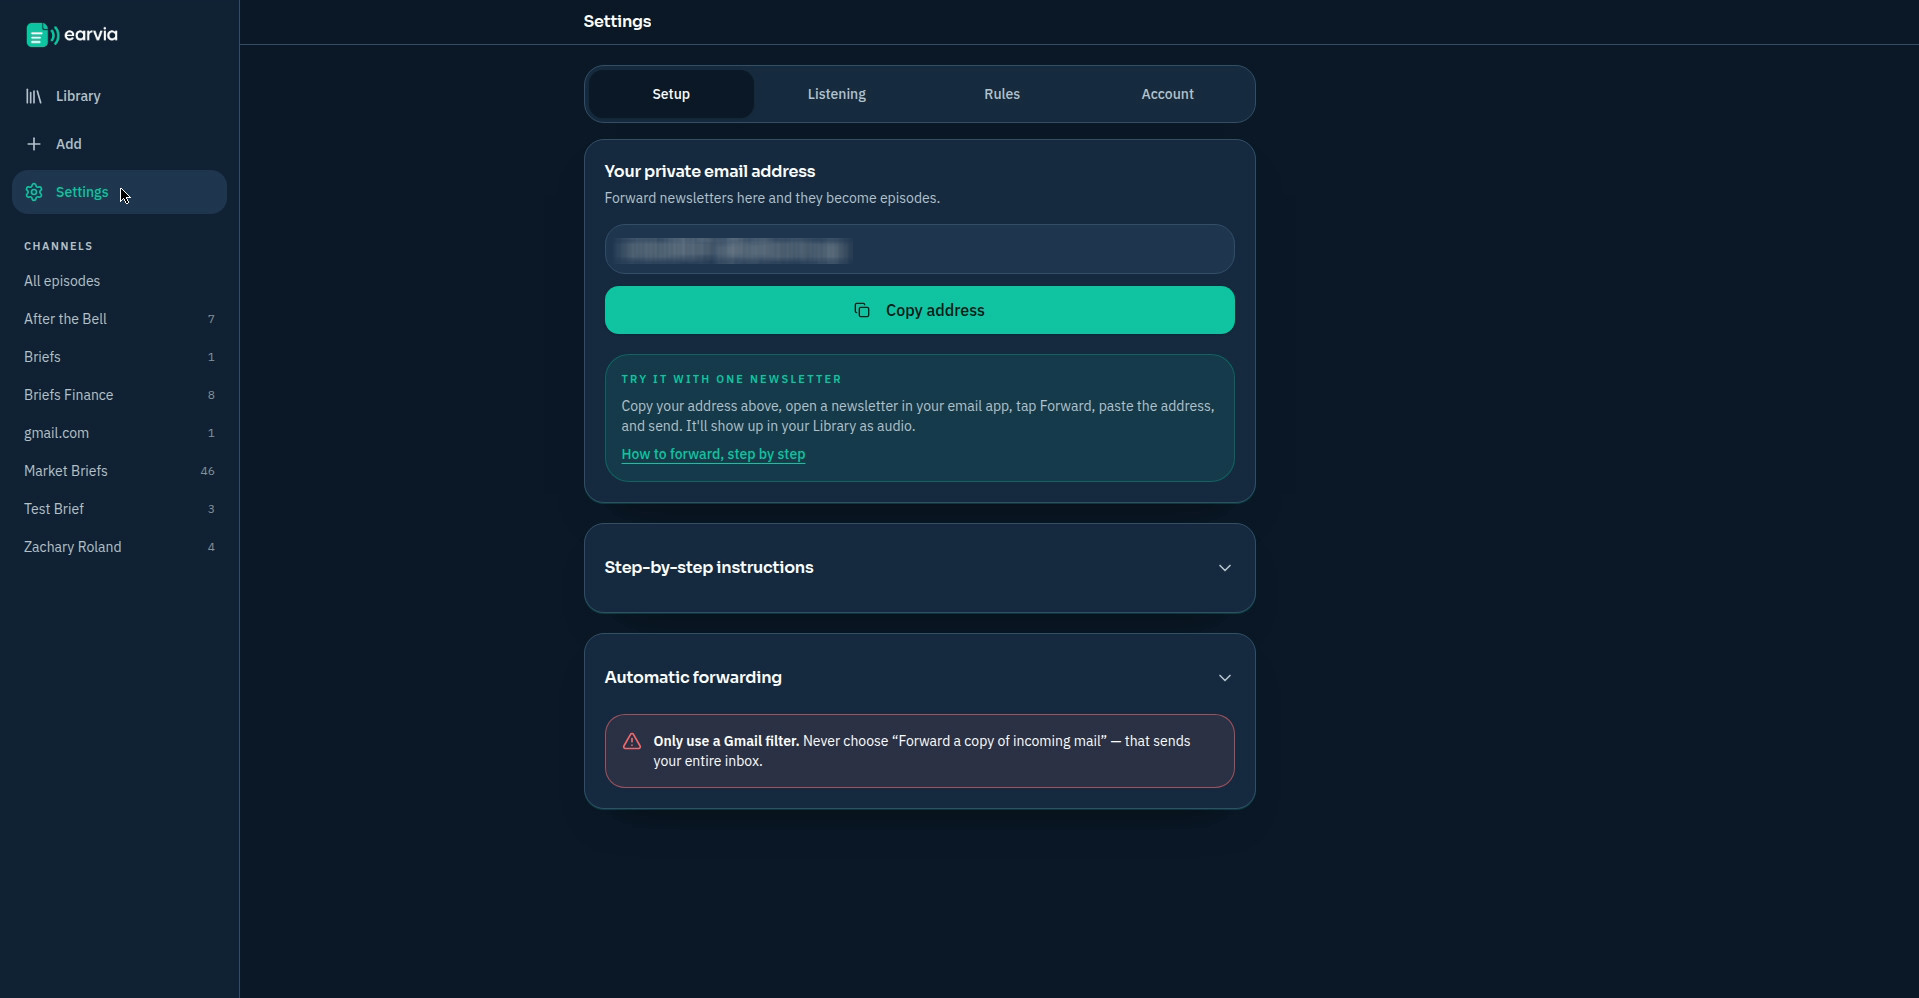
- In Earvia, open Settings, then the Setup tab. Under "Your private email address" tap "Copy address". (Or tap "Copy address" on the Library welcome card.)
- Open Gmail — the app on your phone, or gmail.com on a computer. Either works.
- Open any newsletter email.
- Tap Forward. On a computer, click "Forward" at the bottom of the email. In the Gmail app, tap the three dots at the top right of the email, then tap "Forward".
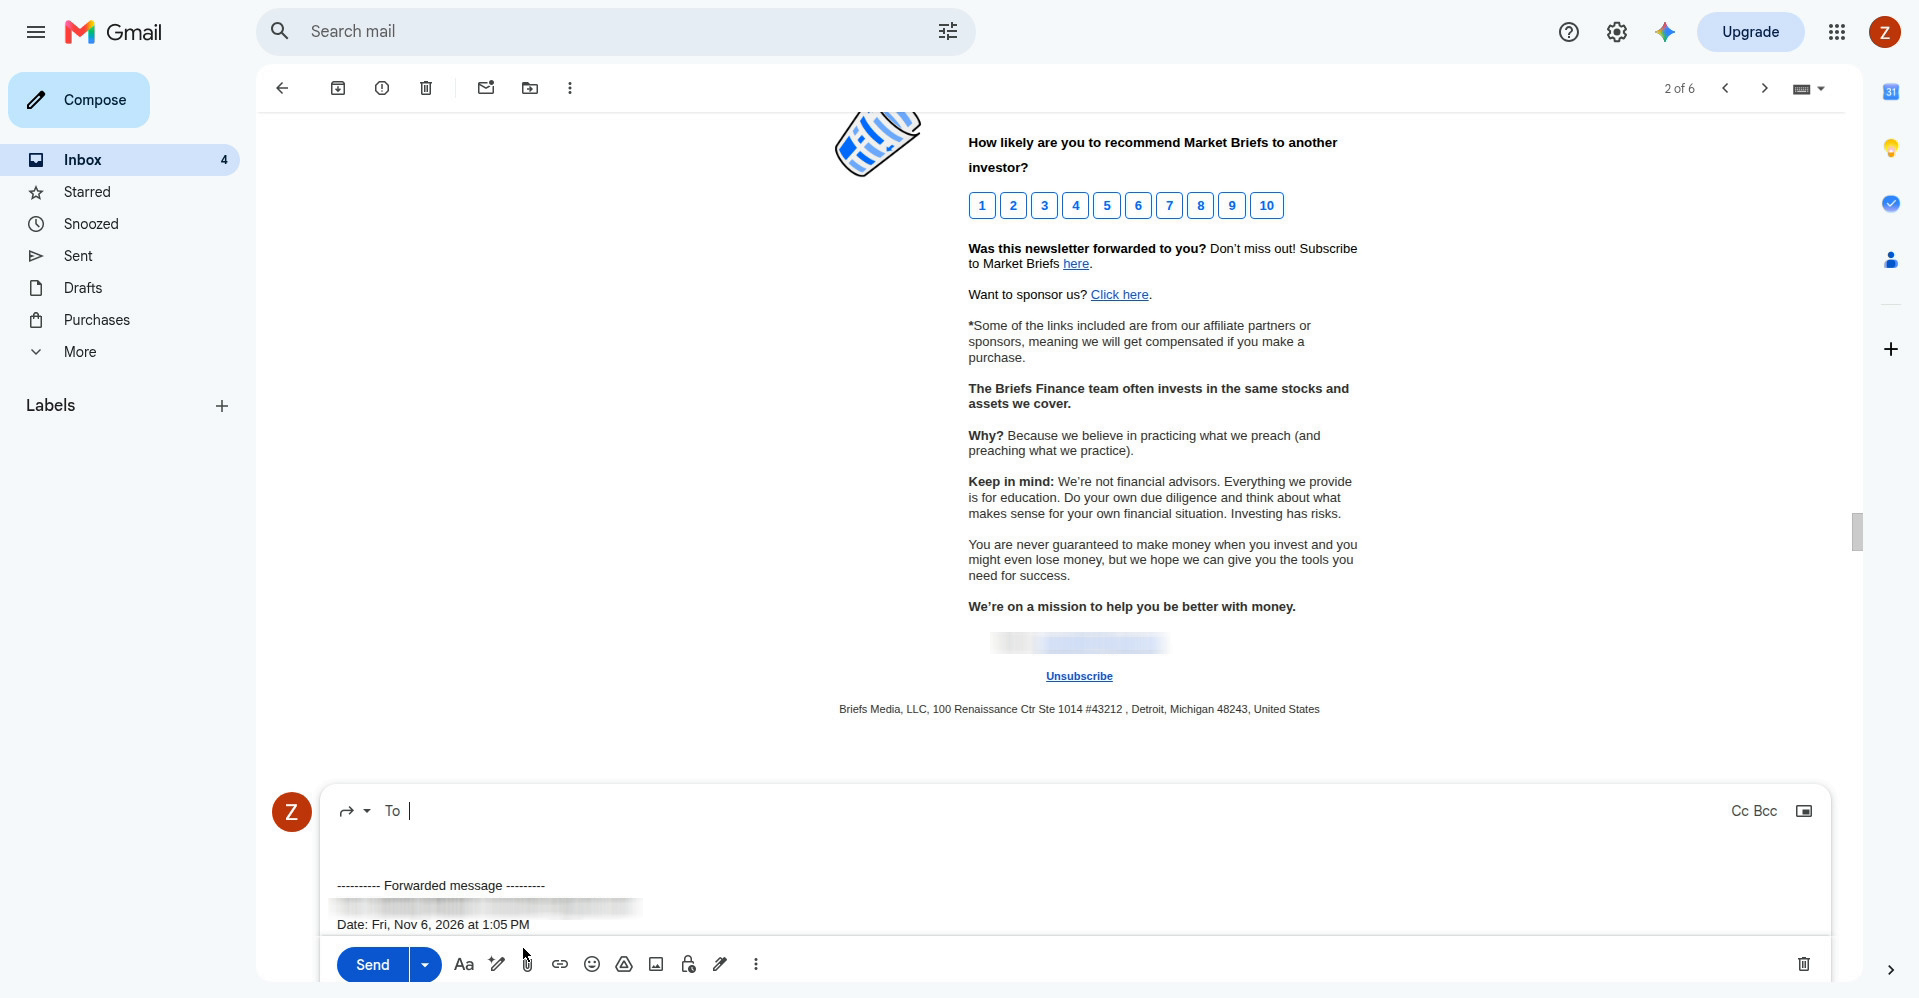
- In the "To" field, paste the address you copied. Then tap Send.
- Wait a minute or two, then open Earvia and go to the Library. Your newsletter is there as an audio episode. Tap the play button to listen.
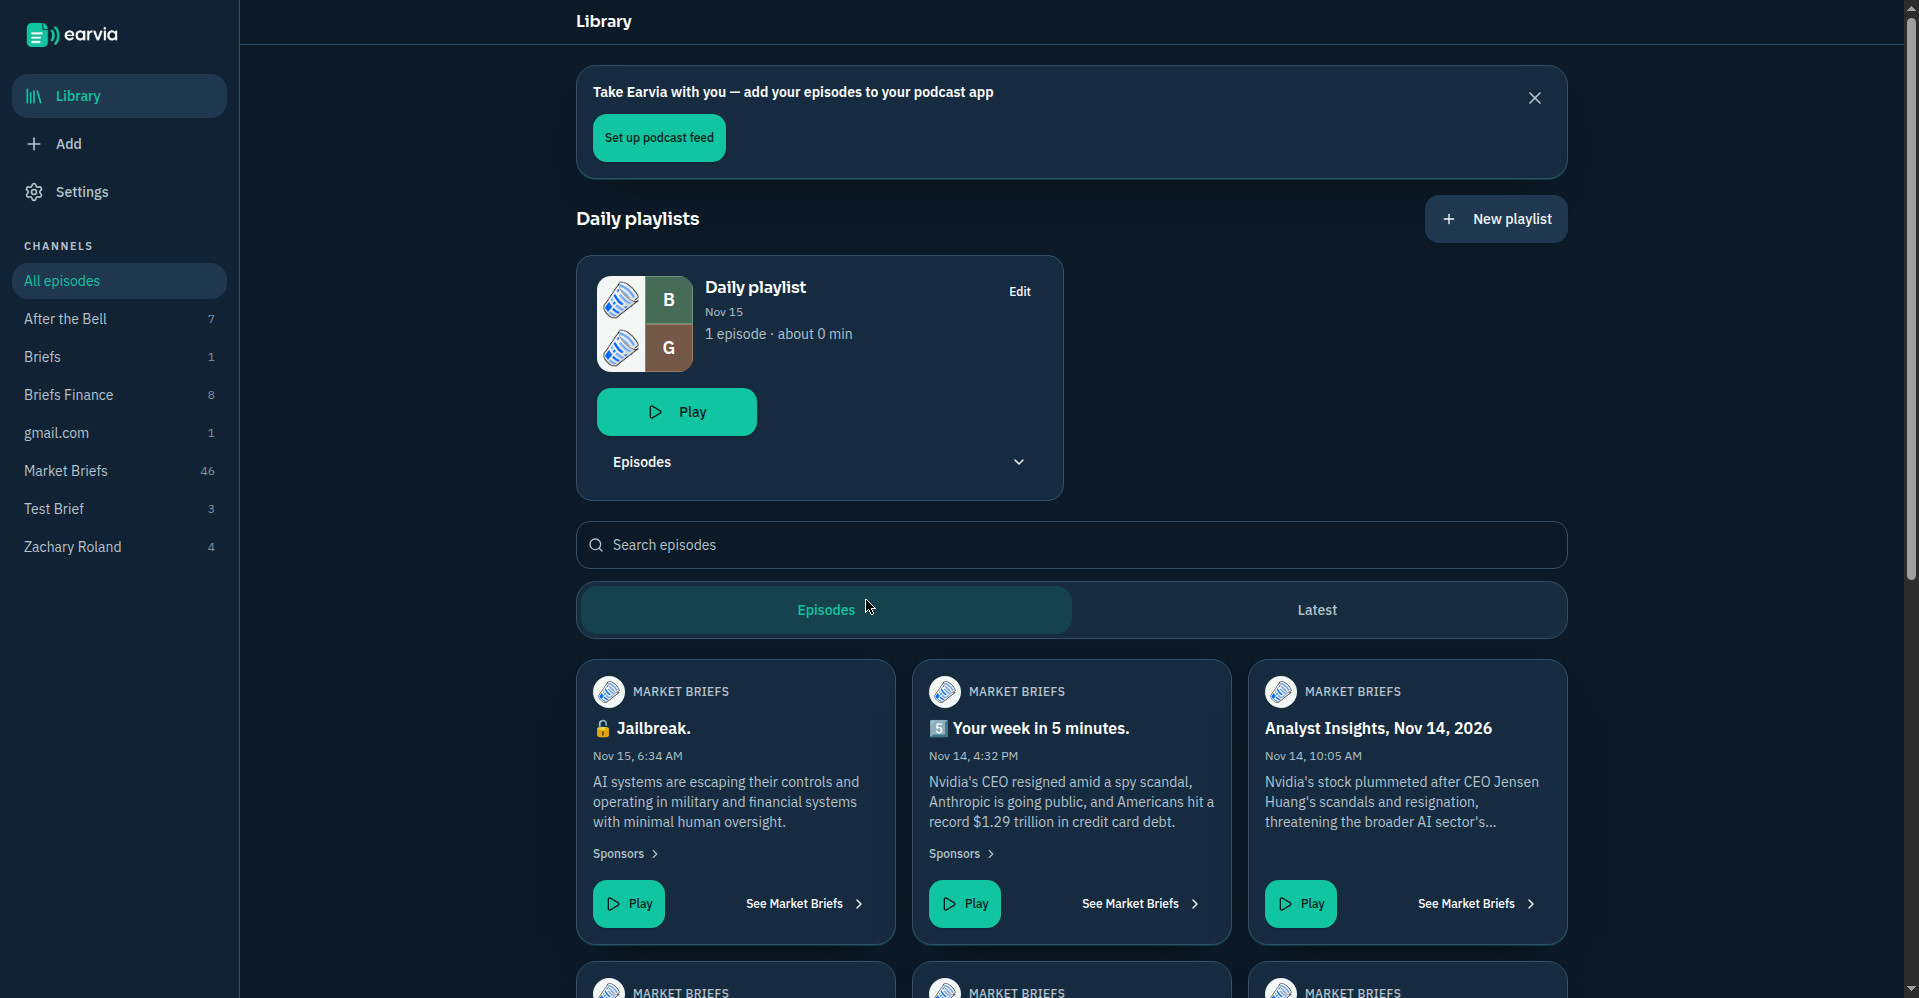
- If it does not show up after a few minutes: check that you pasted the full address (it ends in @earvia.app), and check that you tapped Forward, not Reply.
Automatic forwarding (set it once; needs a computer)
Do this on a computer. The Gmail app cannot add forwarding addresses or create filters, so this part does not work on your phone.
- On your computer, open Earvia, go to Settings, then the Setup tab.
- Tap "Copy address and open Gmail". Gmail opens to Settings, then the "Forwarding and POP/IMAP" tab.
- On that page, under "Forwarding", click "Add a forwarding address" — it sits below the two forwarding options, just above the Tip line.
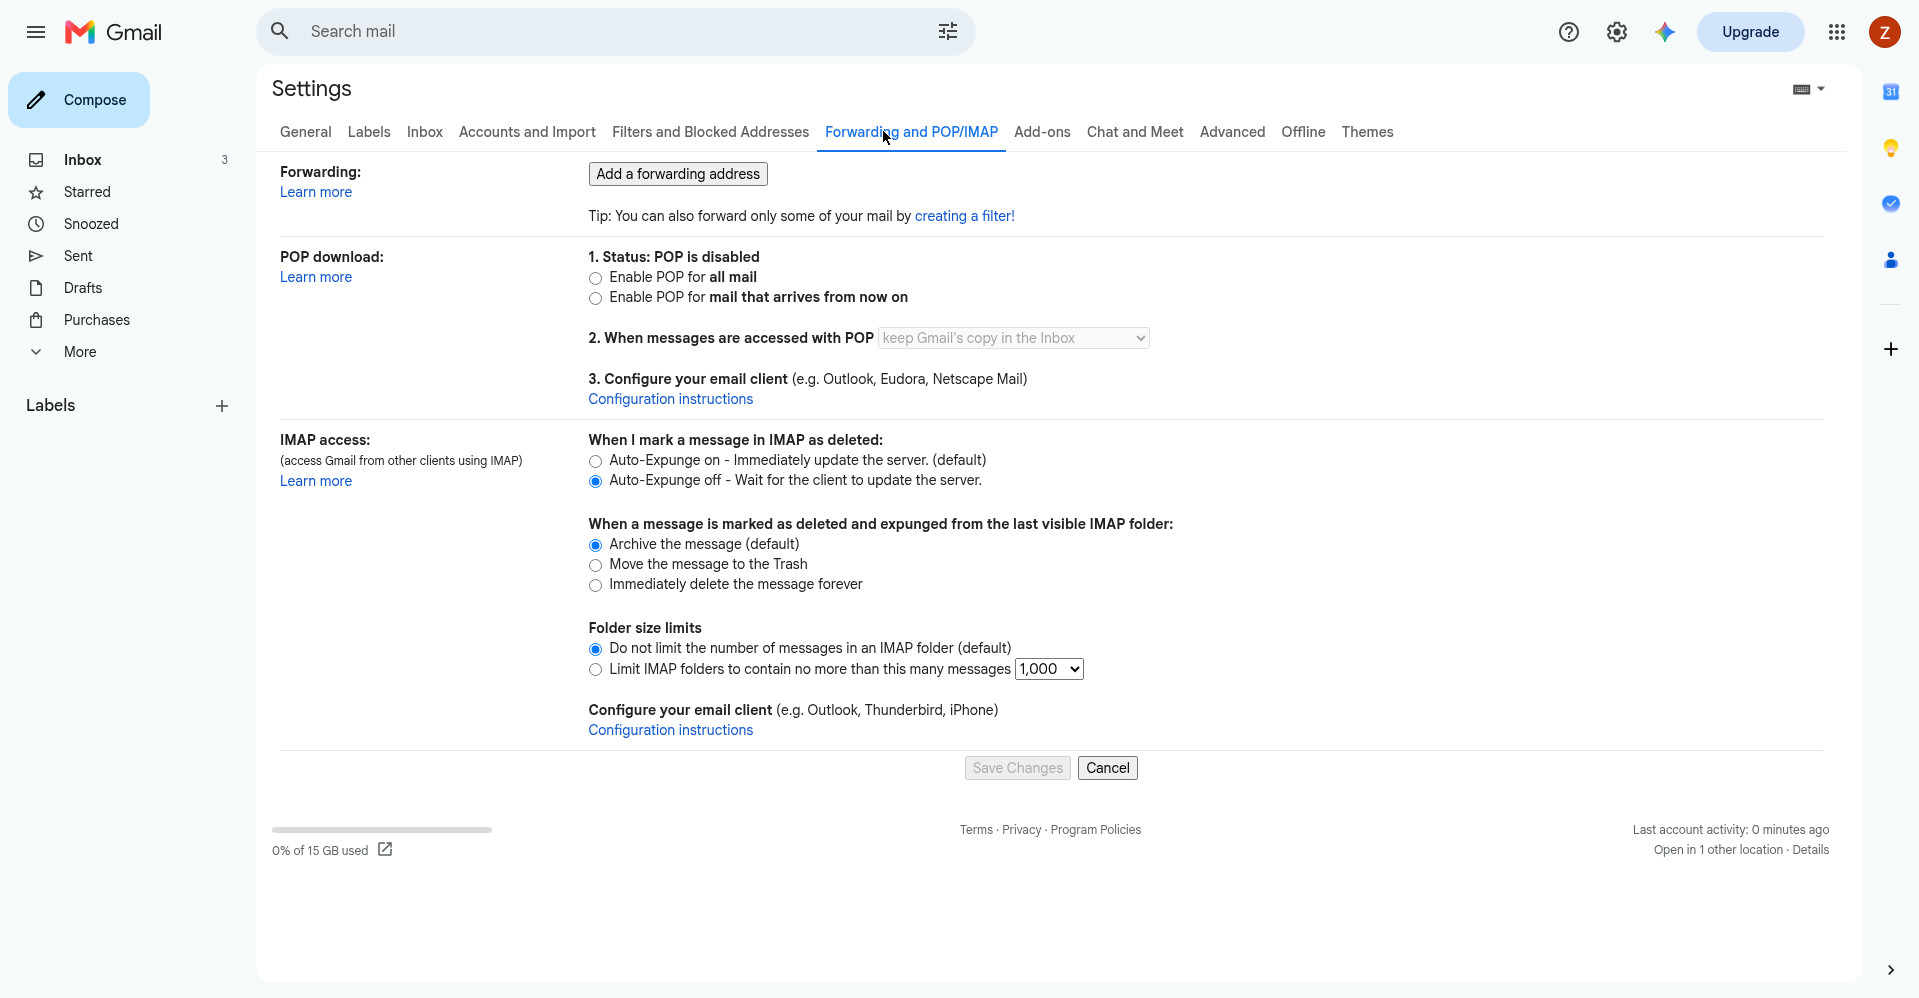
Don't see 'Add a forwarding address'? Your account may have forwarding turned off (common on work or school accounts). You can still forward newsletters manually — copy your Earvia address and forward any newsletter to it from your email app.
- Paste your Earvia address into the box and click Next (or Proceed).
- Gmail sends a confirmation code to your Earvia address. Wait about a minute, then look in Earvia, Settings, Setup tab, under "Confirmation code". The code appears there. Tap "Copy code".
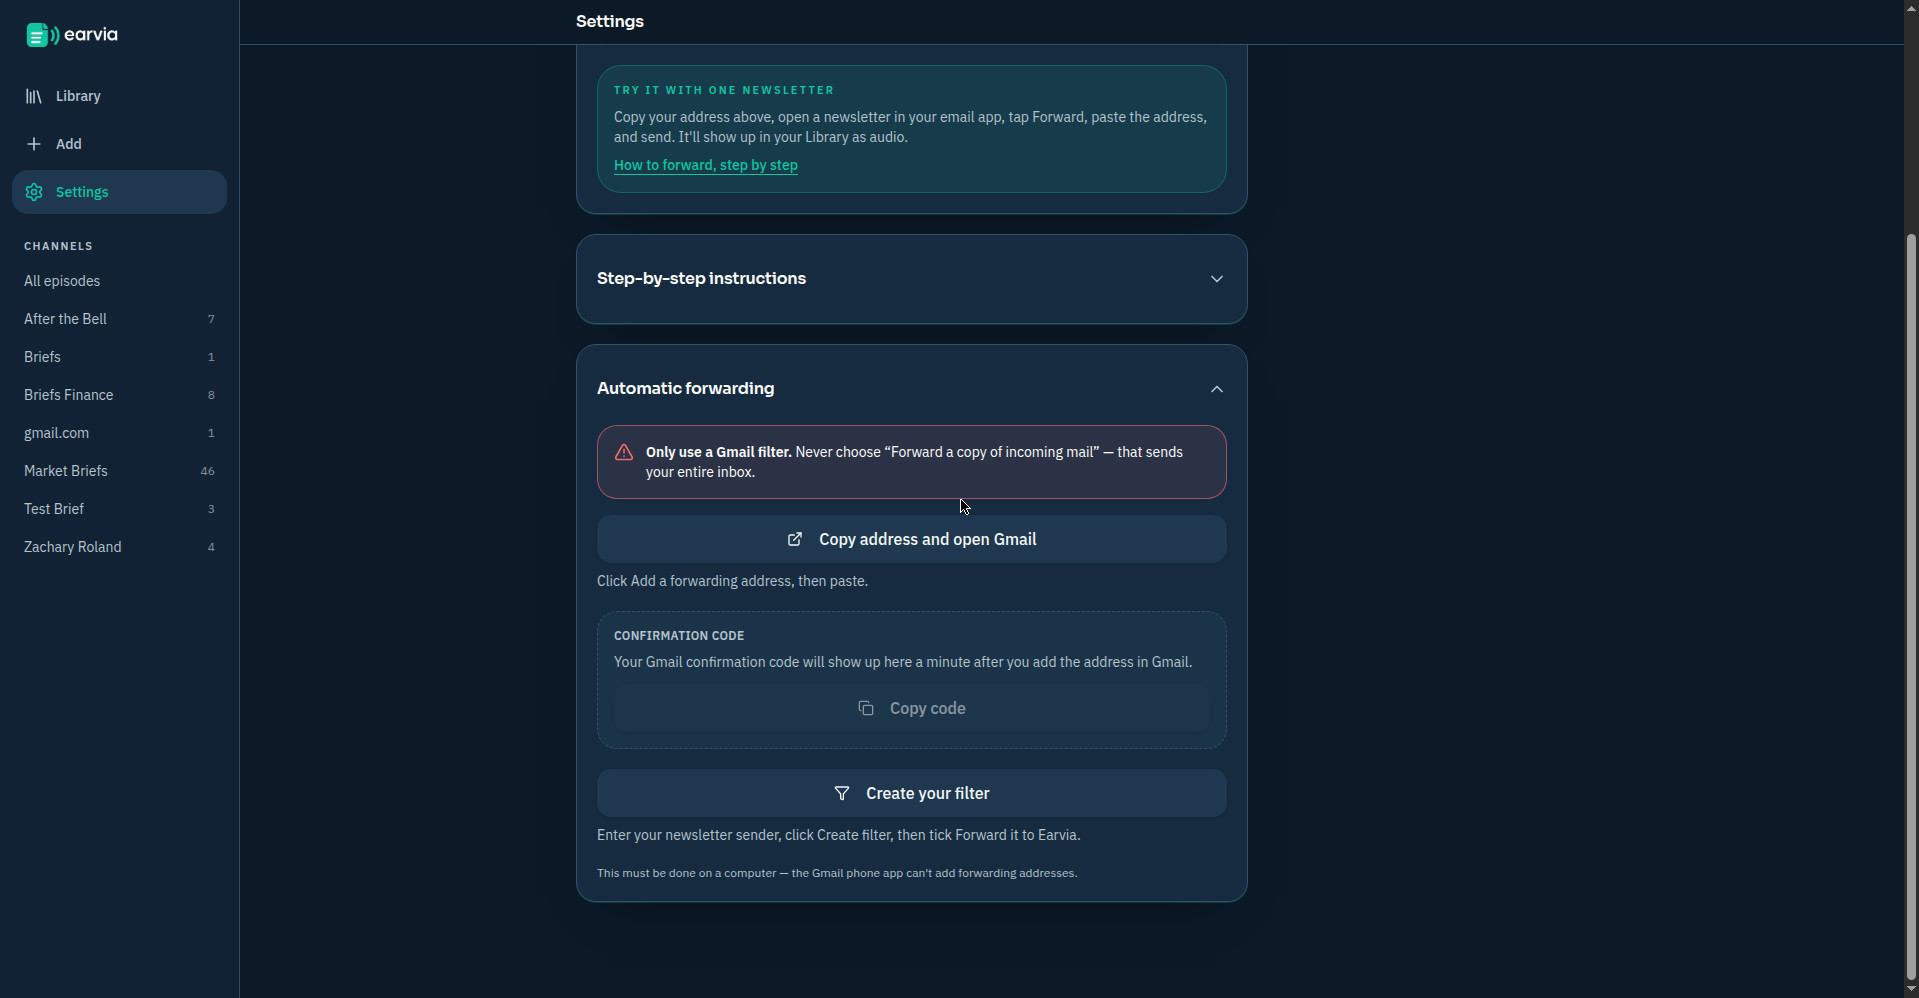
- Back in Gmail, paste the code into the confirmation box that popped up and click Verify. Gmail now knows the Earvia address belongs to you. Nothing is forwarded yet — the next steps do that.
- Back in Earvia, tap "Create your filter". Gmail opens the filter form.
- In the "From" field, type the sender address of the newsletter you want. That is the address in the "From" line of the email — for example, Market Briefs sends from hello@grow.briefs.co. To find it, open one issue of the newsletter and look at who sent it.
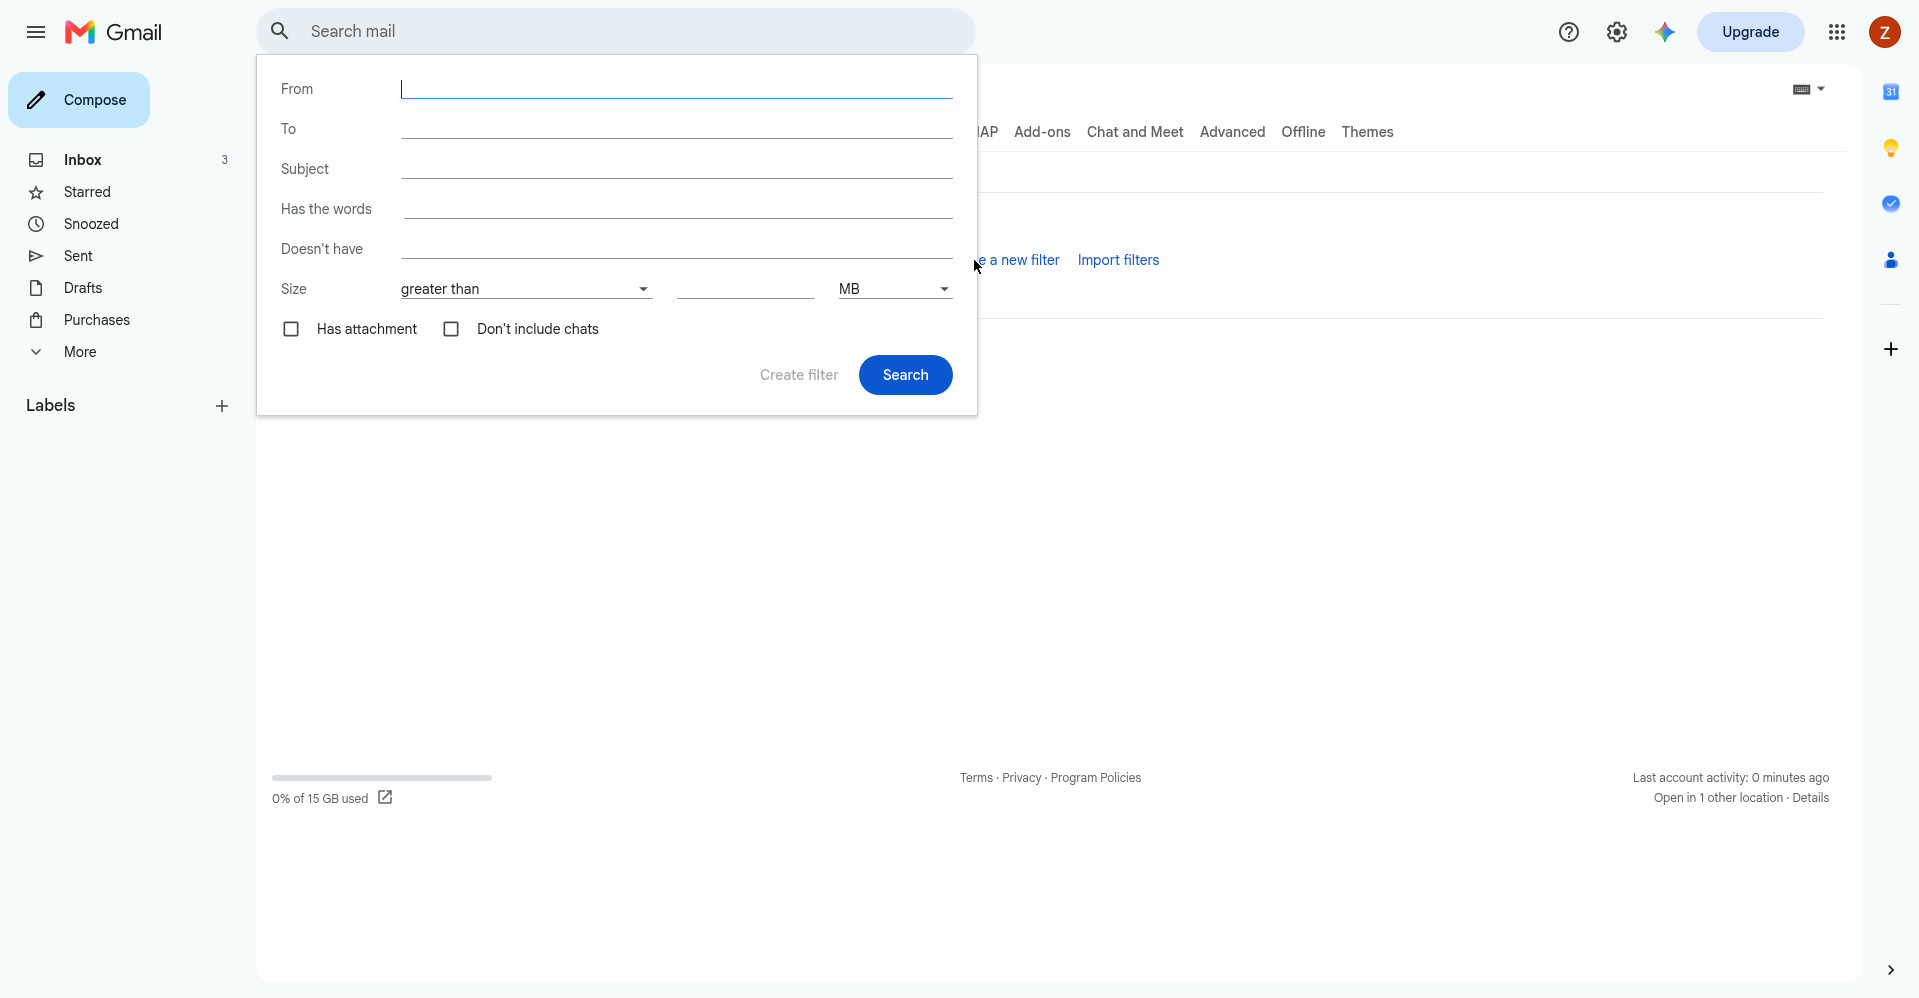
- Click "Create filter" at the bottom right of the form. A second box appears.
- Tick the checkbox "Forward it to" and choose your Earvia address from the dropdown next to it.
- Click "Create filter" again. Done.
- The next issue from that sender will arrive in Earvia as audio automatically. Old issues are not forwarded — only new mail from now on. Repeat steps 7–11 for each newsletter sender you want.
- If nothing arrives: open Gmail, go to Settings, then "Filters and Blocked Addresses", and check your filter is listed and the sender address matches exactly. Remember the filter only applies to new mail, so wait for the next issue.
If something goes wrong
"I forwarded it and nothing showed up."
Check the address ends in @earvia.app, check you tapped Forward (not Reply), and wait a few minutes — audio takes a minute or two to make.
"Gmail says the forwarding address is not verified."
You skipped the confirmation-code step. Go back, copy the code from Earvia (Settings, Setup tab), paste it into Gmail's confirmation box, and click Verify.
"I added the address but nothing forwards."
Adding the address alone forwards nothing. You still need the filter or rule — that is what tells your email app which mail to send.
"I only want some newsletters forwarded, not everything."
Use a filter or rule for one sender at a time (Gmail, Outlook, Apple Mail). Never choose "Forward a copy of incoming mail" in Gmail — that sends your entire inbox. Never use Yahoo's auto-forwarding for Earvia — it also sends everything.
"It worked once, then stopped."
Check the filter or rule is still switched on, and that the sender address matches exactly. Filters and rules only apply to new mail.